

Before telling you about this Super Easy DIY Canvas Print we gotta go to that good ol’ disclaimer: Housevegan.com is a participant in the Amazon Services LLC Associates Program, an affiliate advertising program designed to provide a means for sites to earn advertising fees by advertising and linking to Amazon.com. This post contains Amazon affiliate links.

Good morning, friends! Today I’m so excited to share a little piece of our home with you. As a surprise to no one, we do a lot of decorating in the fall and for Halloween. This year I decided to really go all out with the mantle. Why not?
I wanted something more Autumnal than Halloweenish, but still somehow witchy and spooky.
Snow White was kind of a perfect and natural go to for a theme. For one thing, she’s my favorite Disney princess. Dark hair, loves to cook and clean for those she loves… we’re basically the same. Plus, the artwork is easy to bring into a fall motif, and, c’mon The Evil Queen? She’s one of the best witches ever and is definitely my favorite villain. This mantle is our ode to Fall, Snow White, The Evil Queen, and Disneyland at once.
First, we’ll start with what I didn’t actually make so there’s no confusion. The owls, pumpkins, mesh runner, florals, and vase were all bought at Dollar Tee. The apples are from Michaels, the Moira pic was drawn by our incredible friend, Alice, and the paw prints are Moira’s and Eddie’s. They get incorporated into every mantle design we do!
Ok, now for the DIYs.
Let’s start with the cauldrons. How cute are those?? I honestly threw them together. No, I’m not amazing, I just look at a lot of Halloween crafts so the inspiration was there. Each was made out of:
- a Round Glass Floral Bowl
- 3 marbles as the feet
- rubber toy snakes for the handles
- superglue
- hot glue
- spray paint
I bought everything but the paint at Dollar Tree and they took less than 20 minutes to make.
Next, we needed a spooky looking spell book. Not one of these colorful glittery things you can buy, but something that looked steeped in magic and mystery. Our’s is made out of Dollar Tree journals, hot glue, old plastic Halloween rings (that I bought last year), paper towels, Mod Podge, and paint. See the tutorial here, and make your own! I had this craft bookmarked for years but felt too intimidated to give it a go. So silly. They’re actually really easy to make and they look BEAUTIFUL.
Now, you can’t have a Snow White mantle without a mirror or two. I made these magic mirrors using this tutorial from Bargain Bethany. Again, everything but the paint came from the Dollar Tree. They look absolutely stunning in person.
And last but not least for the DIYs was this print. Y’all, this print! Let’s talk about this print.
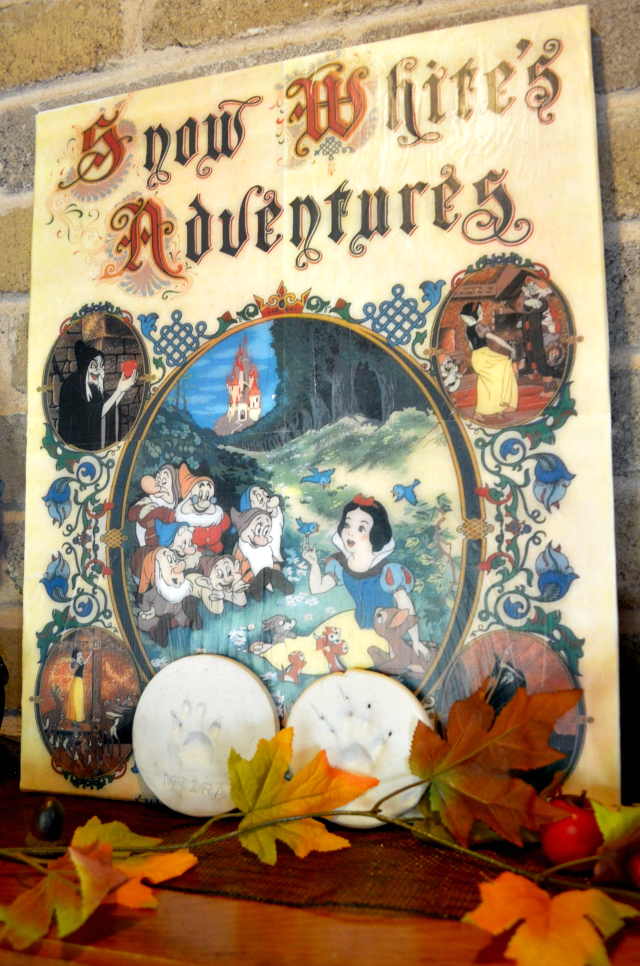
I really wanted a big vintage Snow White picture right in the middle of the mantle. Not only was it hard to find one that matched our aesthetic, but those that came close were just too expensive to justify. I knew a DIY was the way to go.
This piece is all about decoupage. It allows you to turn any high-quality image into a beautiful piece of art for a fraction of the cost of buying one custom. You can do this with family pictures, vintage images, unique posters, etc. Our piece is actually an old poster for the Snow White dark ride at Tokyo Disneyland, and I think it’s just perfect. The colors are right, it looks old, and the art is wonderful. It totally captures what we adore about one of our favorite rides ever.
?????
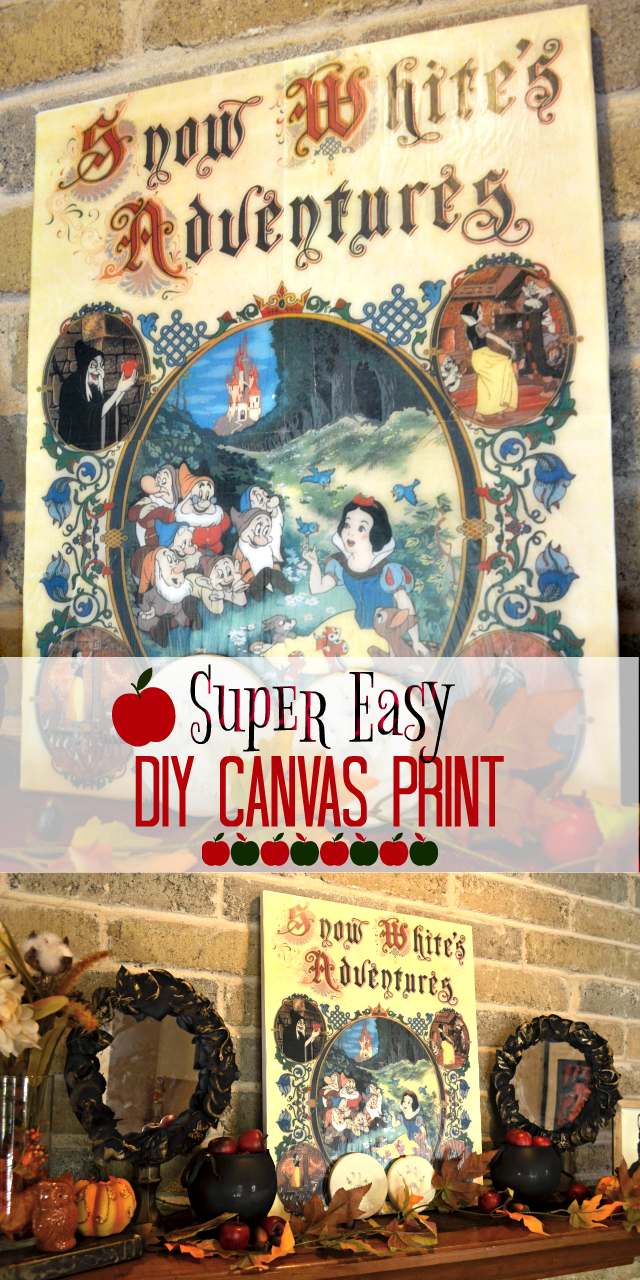
I hope you like our Spooky “Snow White’s Adventures” Mantle as much as we do! And if you do decide to make your own canvas print, be sure to tag #housevegan on those social media pics so I can see!
Includes:
?15+ cozy and delicious fall-inspired recipes (like Pumpkin Pie Almond Milk)
? Helpful tips to make this your best fall yet
?Step-by-step instructions to ensure that you don’t miss out on any of your favorite fall activities or pastimes
?Guides to celebrating Halloween and Thanksgiving the vegan way
?Immediate download so let’s get planning!
Super Easy DIY Canvas Print
Materials
- 1 stretched canvas, your preferred size
- high-def image
- paper trimmer or quality scissors and a steady hand
- spray adhesive (make sure it’s ok for canvas)
- newspaper to protect your workspace
- Mod Podge
- sponge brush
- rolling pin
Instructions
1. The first thing you need to do is size your image. To do this, find out the size of your canvas and google that number in pixels. For example, let’s say your canvas is 16×20″. Google “16×20″ in pixels”. The result for this says 2980×2384 pixels.
2. Open your high-def image in a photo editor like PicMonkey.com, and resize your image to the appropriate pixel size. You may have to crop it a bit. Play around until you get it just right. Export the image as a JPG file.
3. Go to blockposters.com, and upload your image. To customize your image, choose:
- My poster should be… 2 PAGES WIDE
- The orientation should be… Portrait
- And my paper format is…A4 Letter (U.S.)
- Each page printed should…Have a border
- Remove Watermark. This costs $5 to do which I think is worth it. If you don’t want to pay, your image will have a watermark. You can get around this through clever resizing, but that would be based on each individual case. In other words, you’re on your own there!
5. You want to cut all of the white borders off of the images. This is best done using a paper trimmer, but it can be done by hand. Just keep your hand as steady as possible to achieve a straight cut.
6. Once your images are borderless, place them on the canvas in their correct positions. Make sure the sizing is right, etc. If everything looks good, then it’s time to glue.
7. In a well-ventilated area, lay down the newspaper – enough to protect your surface. Place the canvas on the newspaper. Use the spray adhesive according to your brand’s directions. The goal is to use it to glue the images properly (and in their correct positions) onto the canvas. Make sure those prints are aligned exactly where you want them! I can’t stress this enough. If you see bubbles beginning to form, press them out as best you can for a smooth surface. Allow the prints to dry for as long as directed.
8. Now you need to seal your prints with Mod Podge. I’m honestly an animal when it comes to crafts. I just pour a huge glob of Mod Podge onto the images and use the sponge brush to spread it out. Make sure that the product is applied in a thin layer using long even strokes. Pay attention along the edges, really using the Mod Podge to seal those down. From there, use the rolling pin over the entire canvas print to roll the bubbles out. Bubbles will happen if you’re new to decoupage. Just do the best you can. Also, keep in mind that the Mod Podge will go on white, but it clears up when it dries.
9. The print will likely feel totally dry after an hour or so, but let it sit to really really dry for 24 hours. Then your DIY Canvas Print is ready to display!
Let’s be friends! Follow HV on Facebook, Pinterest, Bloglovin’ & Instagram