Sunday, July 28, 2013

Sunday Wind Down 1.0

I had a great week.

I drank a million cups of coffee.


I worked with my KoalaCat laying on the thin top of my chair. Only because I was sitting on his favorite spot in the house.


I rekindled love for an old accessory.


My husband and I went on a date. We saw Design for Living which was one of the last “naughty” films to come out of classic Hollywood before the Hays Code prude-ed things up. I didn’t eat any real food that day so before the movie I grabbed a bar by Bearded Brothers to snack on. So good! We finished our evening with dinner at Thai Passion. I’m always in the mood for Thai.


I saw some family this weekend which meant I was in the car a lot.


This upcoming week will be busy busy. Lots of work, house work, shopping and getting ready to travel to Portland!


Thursday, July 25, 2013

Organized Christmas in July

Image courtesy of stockvault.net
For most people the Christmas season starts in December, but this year we’re starting in July. Hear me out.

I normally start thinking about Christmas in early Fall and last year I found myself feeling like there had to be a better way to do the holidays. My husband and I always did Christmas in a rush and never truly felt fulfilled in what we were doing. I would compensate by scrambling to force the fulfillment while he would just withdraw. Considering the amount of money and time that goes into Christmas, this was no longer acceptable. I did some research and found myself on OrganizedChristmas.com. There are several programs to choose from, but we picked the Christmas Countdown. It organizes Christmas tasks by 6 themed weeks starting in October and ending after the first week in December. It was the perfect program for us.

Last year our biggest Countdown successes were:
  • Hand making all of our cards and sending them out by December 10th.
  • Completing most of our Christmas shopping by the second week of December.
  • Organizing Thanksgiving for my entire family.
  • Baking up a storm before December even started. Several batches of 6 different cookies, biscuits, rolls, chocolate beet quick breads, etc.
  • Buying our first Christmas tree and purchasing only 2 inaugural ornaments. All the others were from our childhoods or gifts.
  • Being prepared for holiday season birthdays. Those guys always get left by the wayside.
  • Scheduling cat sitters for our holiday trip well in advance.
  • Having time to do things we never could in previous years. Like roof top ice skating:


The countdown provided us with valuable information that will be used for years to come. We have all budgets, addresses, shops and recipes recorded.  All the things that we usually scramble for, we scramble for no more.

So why start in July instead of October? Reviewing last year’s Christmas binder we were confronted with three issues we’d like to avoid this year. Two small ones:
  • Not having enough time to research the very best gifts.
  • Not giving ourselves near enough time to craft anything other than cards.
And a large one:
  • Bypassing our budget by several hundred dollars.

Only three issues is a God send however they are issues that we think we can overcome with more time. 

We’re not trying to celebrate Christmas for five months so we’re taking it very slowly. Like a Countdown To The Organized Christmas Countdown. So far we’ve:
  • Started thinking about quality gifts to make.
  • Bought one gift. One of those “This would be perfect for so-and-so!” moments.
  • Started discussing budgets. We’re considering putting away a certain amount of money every pay check to build up a little Christmas nest egg.
  • Started a Christmas Prep Pinterest board.
  • Added the following pages from OrganizedChristmas.com to my home management binder:


I’m going to try to use the 25th of each month as a check in point to see how we’re coming along. A variation of the Organized Christmas Rudolph Club. So far I can say that Christmas in July is coming along very nicely.

Wednesday, July 24, 2013

Homemade Graham Crackers and Icing


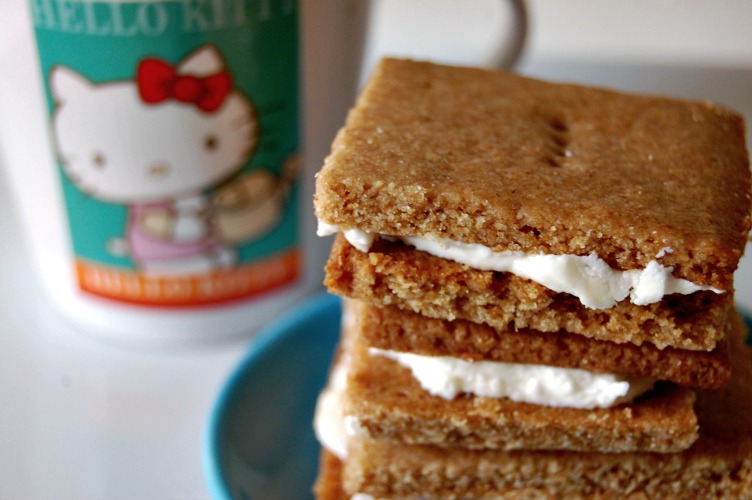
When I was a little girl, my Grandmother used to make me graham crackers and icing. While the flavors of brown sugar, honey and vanilla obviously compliment each other you might not think to put them together in the form of a graham cracker and icing sandwich. But she did and I grew up on them. 

Now that I’m a grown up I still crave graham crackers and icing, but not the preservatives that come with them. So I took my favorite summer treat and made them as clean as possible. 


My Grandma and PapPap are in their 70s and just now on their first trip to Europe. I thought about them the whole time I was making these!

Graham Crackers and Icing
Graham Crackers
Adapted from Homemade Graham Crackers at The Sweet Life
Ingredients:

  • 3/4 cup all purpose flour
  • 3/4 cup stone ground whole wheat flour or graham flour
  • 1/2 teaspoon baking soda
  • 1/4 teaspoon salt
  • 1/2 cup Earth Balance
  • 1/4 cup + 2 tablespoons brown sugar
  • 2 teaspoons honey flavored or regular agave nectar
  • 1 tablespoon water
1. In a small bowl combine the flours, baking soda and salt. Set aside.
2. Cream together the Earth Balance and sugar until fluffy. Mix in the agave nectar and water. 
3. Add the flours and to the sugar mixture and stir to combine. It should just come together without being overly wet. Don’t over mix!
4. Separate the dough into two balls. Over a sheet of parchment paper roll the first ball into a rectangle about 6×9″ and 1/8″ thick. Cut the rectangle into 12 equal pieces and place the whole thing in the freezer. Repeat with the second ball and let them chill for 20 minutes. 
5. Preheat the oven to 350 degrees and make your icing:
Vanilla Icing  
Adapted from Vegan Fluffy Buttercream Frosting in Vegan Cupcakes Take Over the World 
Ingredients:
  • 1/4 cup Earth Balance
  • 3/4 cup + 2 tablespoons powdered sugar
  • 1/4 teaspoon vanilla extract
  • splash non-dairy milk (optional)
1. In a stand mixer whip the Earth Balance until fluffy. Add the powdered sugar and whip for about two minutes. Add the vanilla and whip for another minute until fluffy. If the icing needs to be loosened a little bit add a splash of non-dairy milk and whip until, you guessed it, fluffy. Refrigerate until ready to use.
6. Remove the first sheet of dough from the freezer and place the whole thing on a baking sheet. Bake the crackers for 10 minutes, rotating the pan in the oven half way through. The edges should be slightly browned when the crackers are done. Let them cool for a minute or two and then transfer to a cooling rack. Repeat with the second sheet of crackers. 
7. Let the crackers cool completely, at least 30 minutes, before putting on the icing.
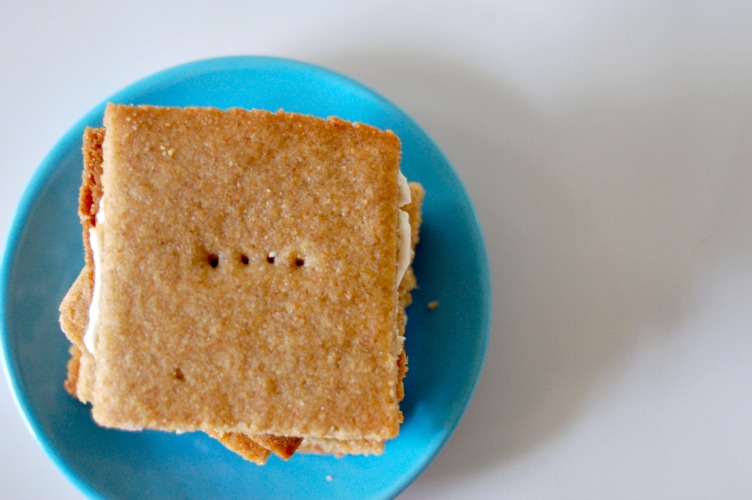
8. When the crackers are cool remove the icing from the fridge. Spread about two teaspoons of icing on one cracker and top the icing with another cracker. Repeat until you’re out of crackers. Store in the fridge for up to three days.